Lab 1: Environment Setup
Introduction
In this lab, we will focus on configuring our environment using an IDE and the Checkmarx plugin. While Checkmarx supports multiple IDEs, for these labs we will be leveraging Microsoft Visual Studio Code, as it is free and commonly used. Checkmarx has integrated plugins with the following IDEs:
- Eclipse
- IntelliJ
- Visual Studio
- VS Code
To learn more, checkout Checkmarx Integrations with Popular IDEs
For these labs, we are using a known vulnerable Java project based heavily on EasyBuggy to demonstrate vulnerability detection and remediation capabilities. Note that if this application is run, this Java application can result in system crashes as a result of memory leaks, deadlock, JVM crashes, etc. In these labs, we are only using Checkmarx solutions that scan source code, thus there is no reason or need to run this project and it is not recommended to do so. If you do wish to run the project, do so at your own risk. It is HIGHLY recommended you do so in a sandbox environment (e.g. within a VM)
Install VS Code
The first step is to install VS Code, if you don’t already have it installed.
If you already have VS Code installed, you can skip this section. When we are done with the lab, you can always uninstall/disable the Checkmarx plugin
- Navigate to https://code.visualstudio.com/download to download the Visual Studio Code installer for your operating system.
- Install VS Code on your machine

Install the Checkmarx Plugin
Once VS Code is installed, we need to install the Checkmarx plugin. The Visual Studio Code Extension is available on the Visual Studio Code marketplace. You can initiate the installation directly from the Visual Studio Code console.
- Open VS Code
- Within VS Code, click the Extensions Icon
-
Type “Checkmarx” in the search prompt, then click Install for that extension

Ensure you select the Plugin entitled “Checkmarx,” not Checkmarx SAST x.x
-
The Checkmarx extension is installed and the Checkmarx icon appears in the left-side navigation panel

Configure the Checkmarx Plugin
-
In the VS Code console, click on the Checkmarx extension icon and then click on the Open settings button. The Checkmarx Settings form opens.

-
In the Checkmarx AST plugin section, enter the following details:
Item Value Checkmarx KICS: Additional Parameters <leave blank> Checkmarx AST: Additional Parameters <leave blank> Checkmarx AST: Api Key <provided by proctor> -
Once entered, the Checkmarx plugin will authenticate to the Checkmarx One tenant
-
Close the Plugin Settings Screen
Connect to a project
-
Mouse-over the Project: field in the left pane, click the pencil icon, then select the project name cxworkshops/totallysecureapp that appears in the middle search bar

Since Checkmarx plugin v2.0.11 release, only the AST/One API Key is required to connect the plugin to a Checkmarx One tenant. If you see a 404 error within VSCode when attempting to connect to a project, it may be because environment variables are overriding the Uri/tenant names from the API key (cx_base_auth_uri, cx_base_uri, cx_tenant). These variables are set if you’ve ever connected to Checkmarx One via the CLI. This can be fixed by deleting the checkmarxcli.yaml file if it exists on your machine.
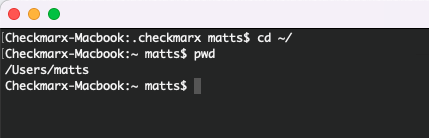
For Mac OSX and Linux, this file can be found at ~/.checkmarx/checkmarxcli.yaml
For Windows, this file can be found at %UserProfile%\.checkmarx\checkmarxcli.yaml
-
Mouse-over the Branch: field in the left pane, click the pencil icon, then select the branch master that appears in the middle search bar

-
The Checkmarx Plugin is now configured and you should see scan results appear in the left pane

Clone the project to your local machine
-
Open a terminal or command prompt and navigate to a directory or folder you’ll be able to easily find (e.g. ~/ on Mac OSX or Linux or %UserProfile%/)
-
Clone our example scanned project to your local machine.
git clone https://github.com/cxworkshops/totallysecureapp.gitYou will need git installed on your local machine if it is not already installed. You can use this guide to see the steps for your operating system
-
Within VS Code, select File > Open Folder, and select the directory totallysecureapp.
-
You may be prompted by VS Code asking if you trust the developers. We will not be executing any of this projects code and will just be reviewing the source, so you can safely accept. Once you complete the labs, you can safely delete the project.
 ’
’
(Optional) Install Docker on your local machine
Docker is required to be installed on your local machine if you wish to use the Checkmarx Infrastructure-as-code (IaC)/KICS autoremediation feature.
Windows / Mac Users
The easiest way to get Docker installed on a Windows or Mac machine is to do so with Docker Desktop.
Prior to installing Docker Desktop on your local machine, ensure you adhere to Docker’s Subscription and Licensing terms.
-
In this example, we will be installing docker on our Ubuntu Linux machine. Use the following command to install docker:
sudo apt install docker.io
-
Review the install requirements and dependent packages and type ‘y’ when ready
-
If you are running on Linux, you will need to ensure that your user can manage docker as non-root. The easiest way to do this is to add your user to the docker group:
sudo gpasswd -a $USER docker
Key Takeaways
- Checkmarx has IDE plugins for all major IDEs
- The Checkmarx One VS Code plugin is available within the Visual Studio Marketplace and is distinct from the Checkmarx SAST plugin
- The Checkmarx One VS Code plugin can be connected to a Checkmarx One instance by configuring one field (the API Key)
- Checkmarx Scan results can be reviewed all within the IDE
- Docker is required for IaC/KICS autoremediation within VS Code